
Replacing a worn-out or outdated patio door can breathe new life into your home—improving energy efficiency, enhancing security, and creating a seamless connection between indoor and outdoor living. Whether you’re swapping out a single pane of glass or installing an entirely new door system, this guide will walk you through everything you need to know: from door styles and materials to cost considerations, step-by-step replacement instructions, and answers to common questions. Links to trusted sources are included so you can verify details or learn more.
1. Why Replace Your Patio Door?
- Save on Energy Bills: New patio doors with insulated glass and tighter seals can cut heat transfer by up to 25%, lowering your heating and cooling costs (Energy.gov).
- Boost Comfort: Modern weatherstripping, low-E coatings, and properly sealed frames keep drafts and condensation at bay.
- Enhance Security: Upgraded multi-point locks, reinforced frames, and stronger glass (laminated or tempered) make it harder for intruders to break in.
- Refresh Your Home’s Look: A sleek, contemporary patio door instantly updates both your interior and exterior style.
- Enjoy Smooth Operation: High-quality rollers, well-designed tracks, and multi-point locks ensure your new door slides or swings effortlessly.
2. Which Patio Door Style Should You Choose?
Here are the most popular styles you’ll encounter when replacing a patio door. Think about how you’ll use the opening, how much natural light you want, and which look best fits your home’s architecture.
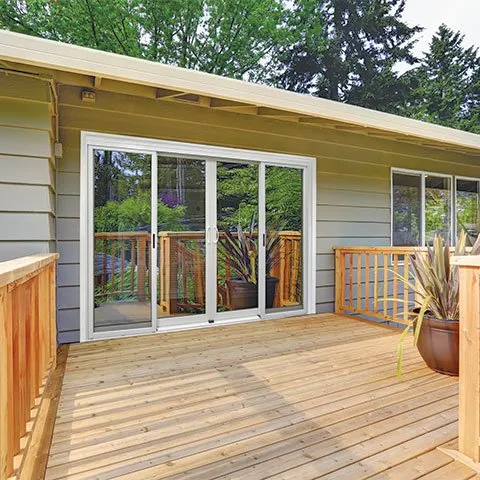
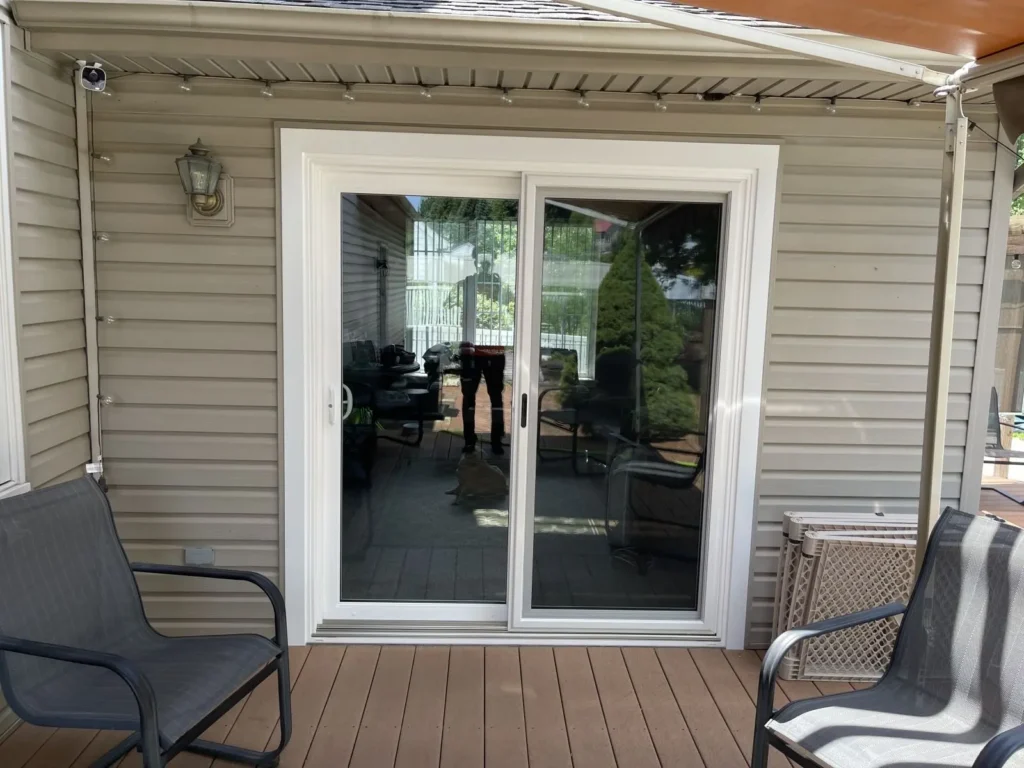
Sliding Glass Doors
- How They Work: One or more panels slide horizontally on a track in front of a fixed panel.
- Why People Like Them: They don’t swing into or out of the room, so you save floor space. The large glass panes flood your room with natural light.
- Things to Consider: The center meeting rail can interrupt your view, and the tracks will need periodic cleaning to keep the rollers gliding smoothly.
- Best For: Standard-sized openings (often 5–8 feet wide) where practicality and a clear view of the patio or backyard are top priorities.
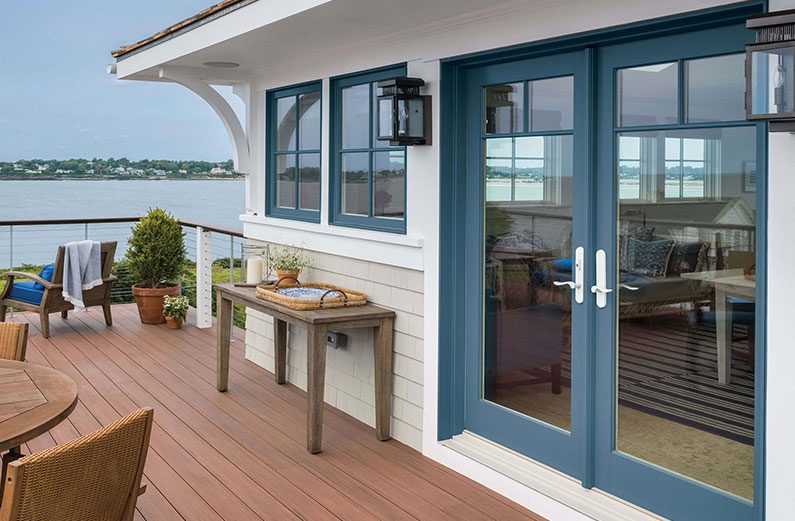
French (Swing) Patio Doors
- How They Work: Two doors meet in the middle and swing open (either inward or outward). Many come with matching sidelights.
- Why People Like Them: They offer a timeless, elegant look. With both doors open, you get a wide, unrestricted opening.
- Things to Consider: You need enough clearance for the doors to swing, and they typically cost more than standard sliders.
- Best For: Living or dining rooms where you want a touch of classic charm—and enough room for the doors to swing freely.
Bi-Fold (Accordion) Doors
- How They Work: Multiple narrow panels fold accordion-style, stacking neatly to one or both sides of the opening.
- Why People Like Them: When fully opened, they create one large, uninterrupted opening—perfect for blending indoor and outdoor spaces.
- Things to Consider: Bi-fold systems tend to be pricier and require a sturdier header. The track and hinges need occasional upkeep.
- Best For: Kitchens or family rooms where you really want to “erase” the boundary between inside and outside—especially during gatherings or parties.
Hinged (Single or Double Swing) Doors
- How They Work: One or two doors swing open on side hinges, much like a standard entry door.
- Why People Like Them: They seal tightly and can be very secure. Because they don’t rely on a sliding track, they suit smaller or uniquely shaped openings.
- Things to Consider: The swing area can limit furniture placement near the door, and you’ll need more clearance than with a sliding door.
- Best For: Side yard entrances, small decks, or rooms where a traditional door feels more appropriate than a slider.
Stacking Sliding Doors
- How They Work: Two or more sliding panels “stack” behind each other when opened—so there’s no large post or mullion in the center.
- Why People Like Them: They offer a broad glass expanse and a modern, minimalist look. The view feels almost uninterrupted.
- Things to Consider: Stacking doors require a wider rough opening and heavier framing, making installation more involved. They also carry a higher price tag than basic sliders.
- Best For: Living rooms or sunrooms that face a beautiful backyard—anywhere you want a nearly wall-to-wall glass view.
3. Patio Door Styles at a Glance
| Door Style | Common Frame Materials | U-Factor<br>(Lower = Better Insulation) | SHGC<br>(Lower = Better in Hot Climates) | Installed Cost Range | Security Features | Maintenance |
|---|---|---|---|---|---|---|
| Sliding Glass | Vinyl, Aluminum, Fiberglass | 0.28 – 0.35 | 0.18 – 0.30 | $1,000 – $2,500 | Single-point lock; optional deadbolt | Medium (keep tracks clean, lubricate rollers) |
| French Swing | Fiberglass, Wood, Clad | 0.25 – 0.33 | 0.20 – 0.28 | $1,500 – $3,500 | Multi-point locking standard | Low–Medium (inspect hinges, re-caulk yearly) |
| Bi-Fold/Accordion | Aluminum, Vinyl | 0.30 – 0.38 | 0.22 – 0.32 | $2,000 – $6,000 | Multi-point lock; reinforced panels | Medium (clean track, oil hinges) |
| Hinged Swing | Fiberglass, Aluminum, Wood | 0.25 – 0.32 | 0.20 – 0.30 | $1,200 – $3,000 | Multi-point locking standard | Low–Medium (inspect seals, lubricate hardware) |
| Stacking Sliding | Vinyl, Aluminum | 0.29 – 0.36 | 0.22 – 0.30 | $1,500 – $4,000 | Single or multi-point lock options | Medium (track cleaning, proper alignment) |
These numbers reflect typical double-pane, Low-E glass with argon fill. Always verify the exact U-Factor and SHGC for the model you select.
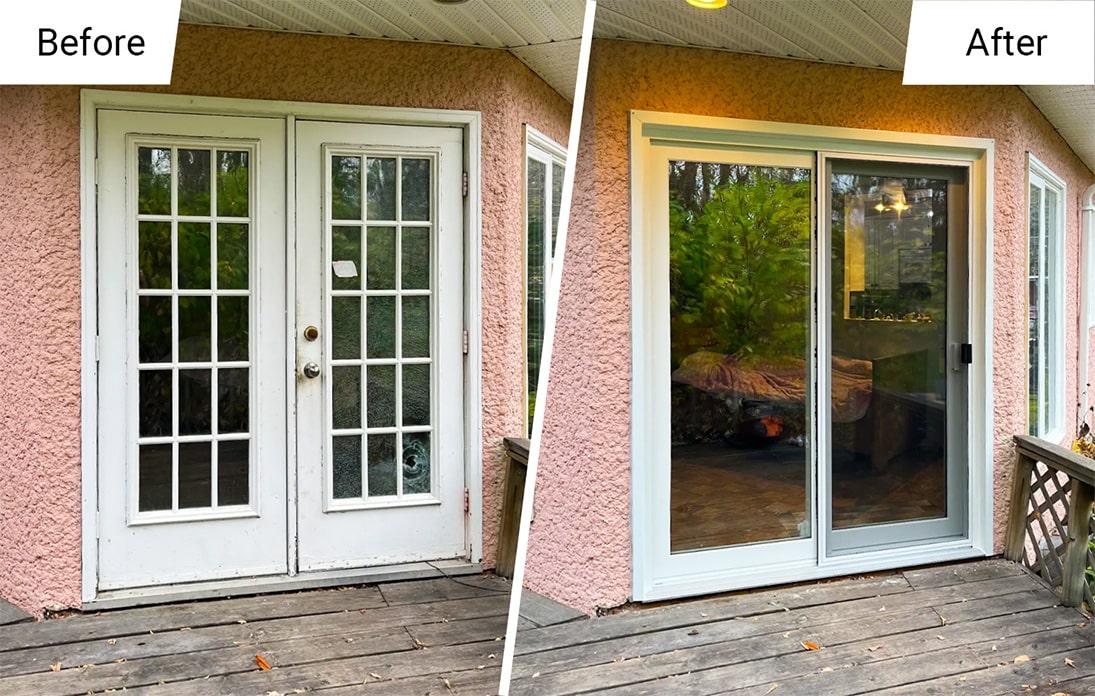
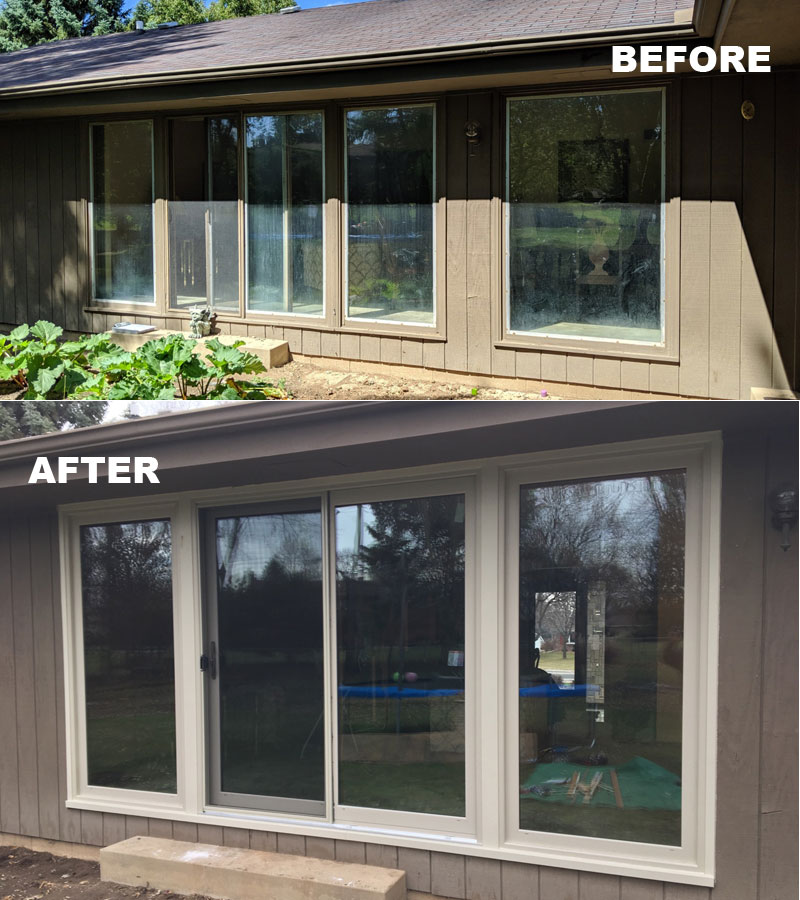
4. How to Replace Your Patio Glass Door
Whether you choose a retrofit (inserting a new unit into the existing frame) or a full-frame replacement (removing the old jamb and trim), these steps will guide you through the process.
A. Measure the Opening Accurately
- Width: Measure inside the jamb at three spots—top, middle, bottom—and use the smallest measurement.
- Height: Measure from the sill to the header at left, center, right—again, use the smallest number.
- Depth: Confirm the wall thickness so you order a door with matching jamb depth (most range from 3¼″ to 4½″).
- Square Check: Measure corner to opposite corner (both diagonals). If they match within about 1/8″, your opening is square. Otherwise, you may need shims or minor framing adjustments.
Learn More: Home Depot’s Patio Door Measuring Guide
B. Choose Your Style and Materials
- Frame Options:
- Vinyl: Cost-effective, low-maintenance, good thermal performance.
- Aluminum: Slim profiles, modern look. (Look for thermally broken frames to prevent heat transfer.)
- Fiberglass: Extremely durable; minimal expansion and contraction with temperature changes.
- Wood or Wood-Clad: Rich, classic appearance; exterior cladding (aluminum or fiberglass) protects wood from the elements.
- Glass Package:
- Double-Pane Low-E with Argon: Ideal for most climates—strikes a solid balance between cost and efficiency.
- Triple-Pane with Krypton Fill: Offers extra insulation (lower U-Factor), which is perfect for very cold regions or if you want superior noise control.
Learn More: Efficient Windows Collaborative – Window Types & Performance
C. Check Permits and Local Requirements
- No Permit Needed? If you’re replacing your old door with a new door of the exact same size (no structural changes), many local building departments waive the permit. But it’s always wise to check—some cities still require a quick inspection.
- Permit Required? If you change the door’s rough opening—widen it, make it taller, or alter load-bearing elements—a permit and follow-up inspection are almost always mandatory.
Learn More: International Residential Code (IRC) R311 – Building Planning
D. Remove the Old Door
Retrofit (Insert) Approach:
- Pop off the interior stops (those thin strips holding the sash).
- Slide out the old sashes and bottom track.
- Clean the pocket thoroughly—scrape away old caulk, remove debris, and check for any rot. If you find wood rot, replace or sister the damaged studs or sill before moving on.
Full-Frame Approach:
- Carefully remove interior trim and casing around the door.
- Unscrew or pry out the old door, jamb, and exterior trim.
- Inspect the framing—the sill, jambs, and studs—for any rot or damage. Repair or replace these before proceeding to the next step.
E. Prepare the Rough Opening
- Flashing Tape: Line the bottom, sides, and top of the opening with self-adhesive flashing tape. Leave a small tab you can fold over the nailing flange when the new door is in place.
- Check for Level & Plumb: Lay a level on the sill and each jamb. Add shims where necessary until everything is perfectly straight—this ensures your new door won’t bind or allow drafts.
Learn More: Building Science Corporation – Proper Window Installation
F. Install the New Door
Retrofit (Insert) Installation:
- Slide In the Unit: The new patio door should be about ¼″ smaller than your measured opening so it can slip into the existing frame.
- Shim and Level: Place shims at each corner and along the sides until the door is perfectly plumb.
- Fasten Per Manufacturer’s Instructions: Most insert doors have pre-drilled screw holes in the jamb. Drive the screws carefully, checking plumb/level as you go.
Full-Frame Installation:
- Position the New Frame: Set the door frame into the rough opening (with flashing tape already in place).
- Shim at Corners and Hinges: Shim behind each hinge location and top corners to make sure the frame is perfectly square.
- Secure the Frame: Screw the nailing flange (or use the recommended fasteners) into the framing, verifying level and plumb after each screw.
G. Flashing and Sealing
- Fill Gaps: Use low-expansion spray foam or backer rod plus exterior caulk to fill the gap between the door frame and rough opening—this blocks drafts and water.
- Fold Over Flashing: If you applied flashing tape around the opening, fold its tabs over the door’s flange so water runs away from the house.
- Caulk the Exterior: Run a neat bead of high-quality silicone or polyurethane caulk around the door’s exterior trim to seal out moisture.
H. Finish the Trim and Test
- Install Interior Stops & Casing: For retrofits, you can often reuse the original interior stops if they’re still in good shape. Otherwise, replace them with new stops and casing.
- Paint or Stain: Touch up wood trim as needed to match your existing décor.
- Operate the Door: Open and close it several times, lock it, slide or swing it fully—make sure everything works smoothly and latches securely.
- Inspect for Gaps: Look for any light or air leaks, inside and out. If you see drafts, apply a bit more caulk or adjust the shims.
5. How Much Will It Cost?
A. Main Factors That Affect Price
- Door Style & Frame Material:
- Vinyl (Basic Slider): $1,000 – $2,500 installed.
- Aluminum (Thermally Broken): $1,200 – $3,000 installed.
- Fiberglass: $1,500 – $3,500 installed.
- Wood or Wood-Clad: $2,000 – $6,000 installed.
- Type of Installation:
- Retrofit (Insert Kit): Labor is roughly $150 – $300 because you reuse the existing frame (total: $1,000 – $2,000).
- Full-Frame Replacement: Labor jumps to $300 – $600 since you remove old framing, install new flashing, and finish with new trim (total: $1,500 – $3,000+).
- Glass Package Upgrades:
- Double-Pane Low-E (Standard): Usually included in base price.
- Triple-Pane or Laminated Glass: Adds $200 – $800 per door depending on size.
- Hardware & Security:
- Multi-Point Locking Systems, Handles, Foot Bolts: $100 – $300 extra if you choose a high-end lock set.
- Permits & Inspections:
- Expect $50 – $200 depending on your city or county.
- Disposal Fees:
- Many installers charge $50 – $150 to haul away and properly dispose of your old door and framing.
B. Retrofit vs. Full-Frame: Quick Cost Comparison
| Feature | Retrofit (Insert) | Full-Frame Replacement |
|---|---|---|
| Remove Old Frame? | No | Yes |
| Labor Cost (Approx.) | $150 – $300 per door | $300 – $600 per door |
| Installation Time (Approx.) | 1 – 2 hours per door | 3 – 5 hours per door |
| Energy Efficiency Improvement | Moderate | High (new frame + foam + sash) |
| Preserve Historic Trim? | Yes | No (you must replace trim) |
| Address Rot/Structural Issues? | Only if frame is sound | Full access—can repair sill/jamb |
| Ideal When | Frame is square & rot-free | Frame is damaged or out of square |
6. Frequently Asked Questions
Q: How long does a patio door replacement usually take?
- Insert Retrofit: A pro can swap the door out in about 1–2 hours per door, assuming no hidden framing issues.
- Full-Frame Replacement: Plan for 3–5 hours per door to remove the old unit, repair framing, install the new frame, flash, and trim.
Q: Do I need a permit to replace my patio door?
- If you’re swapping in a new door of identical size and location, many places don’t require a permit—though you’ll still need to meet local wind-load and energy codes. If you enlarge the opening, change structural elements, or alter the header, you definitely need a permit and inspection. Always check with your local building department first.
- Resource: IRC R311 – Building Planning
Q: Which patio door material is best for a cold climate?
- Fiberglass and wood-clad doors shine in harsh winters. Look for ENERGY STAR® certified models with a U-Factor at or below 0.25. Triple-pane Low-E glass filled with argon (or krypton) offers top-tier insulation for extremely cold regions.
- Resource: ENERGY STAR® Windows, Doors, & Skylights
Q: Can I replace a patio door myself?
- If the existing frame is straight, level, and free of rot, an experienced DIYer can handle a retrofit insert. You’ll need appropriate tools, a friend (two people are better than one when lifting heavy glass), and a solid understanding of shimming and caulking.
- Full-Frame replacements involve cutting into the structure, installing proper flashing, and ensuring a weather-tight seal—tasks best left to professionals who know local building codes, water-management best practices, and how to uphold the manufacturer’s warranty.
Q: How do I maintain a new patio door for a long life?
- Clean Tracks & Rollers: Every few months, vacuum out dirt, wipe the tracks, and use a small brush to remove lodged grit.
- Lubricate Moving Parts: Once a year, apply a silicone-based spray to rollers, hinges, and lock mechanisms. Avoid oil-based products—they attract dust and gunk up over time.
- Inspect Weatherstripping: Check the rubber/vinyl seals around the door for cracks or flattening. Replace worn weather-stripping to keep drafts and water out.
- Re-Caulk Exterior Edges: About every 3–5 years (or sooner if you notice cracks), remove old caulk and apply fresh high-quality exterior silicone or polyurethane sealant.
Authoritative Resources
- Energy.gov – Windows, Doors, & Skylights
https://www.energy.gov/energysaver/design/windows-doors-and-skylights/windows - Efficient Windows Collaborative – Window Types & Performance
https://www.efficientwindows.org/ - International Residential Code (IRC R311) – Building Planning
https://codes.iccsafe.org/content/IRC2021P2/chapter-3-building-planning - Building Science Corporation – Window Installation Best Practices
https://buildingscience.com - Home Depot – Patio Door Measuring Guide
https://www.homedepot.com/c/window-door-measuring-guide
By choosing the right style, material, and installation method, you’ll end up with a patio door that looks fantastic, seals tightly against the elements, and provides years of smooth operation. Use this guide as your roadmap—measure carefully, check local codes, and follow these best practices so your next patio door replacement goes off without a hitch. Good luck!